Bluetooth missing on XPS 15 after reboot

Normally I’m not really posting these kind of blogs but I really needed to help other people because I faced this problem for two times now and both times it took me really days to find a solution that worked for me.

I have a Dell XPS 15 from 2016. Still an awesome machine with the specs that I have. The only thing that was (strange enough) sometimes horrible, was de wifi connection. The speed was not correct and sometimes there wasn’t any connection possible. A colleague of me had the same laptop (same year) and he had the exact problem. So sometimes we had no wifi on the department but the rest of team had. So time for a fix.

Intel® Wireless-AC 9260 160MHz

After some resource I bought the Intel® Wireless-AC 9260 160MHz wifi module. Followed some tutorials on the internet and youtube to build it in and started the device.

Note: First download the drivers for wifi and bluetooth before replacing the Wifi module.

Were is my Bluetooth?

The installation of the WiFi module is not really and issue. You install it, maybe do a reboot to be sure and voila is it working. Bluetooth is a whole different story. In the beginning everything is looking fine. But after one but sometimes more reboots, the Bluetooth is gone. When you go to device manager, you will see an alert by your Intel module. The only thing that is working, is uninstall the driver and scan for new devices. After that, everything is working fine again. But after a new reboot you have to do the same thing all over again.

On the internet you find a lot of people with same problem. Even taping of the last pin of the WiFi module (not something that I want to try). A combination of the solutions (because not every solution was about exactly the same module or new drivers came out etc) worked for me.

So, what worked for me?

Just to make things clear, I have a XPS 15 from 2016 (9550) and I’m using the latest drivers of Intel (December 2019) 21.60.0.4.

  1. Download the Intel® Driver & Support Assistant or go to this site
  2. This will scan for Intel hardware on your machine. I installed every update that was available (please wait with WiFi and Bluetooth).
  3. Download the drivers for WiFi and Bluetooth
  4. Uninstall the drivers via device manager for your Bluetooth and check the checkbox for deleting the drivers of your pc.
  5. Now, first install the Bluetooth driver and after that, install the WiFi driver. If you do this the other way around, the drivers aren’t working correctly and he will keep saying that there is an update for your WiFi. I had this tip from the Dell support desk forum from a dell employee.
  6. Reboot your pc. Maybe Bluetooth is working (it did for me a sometimes but after a day or two the problems started again).
  7. So i digged further and found a couple of times the solution to disable “Secure boot” in the bios. And that makes sense when you read the documentation of Secure boot on the Microsoft site. I quote “Secure boot is a security standard developed by members of the PC industry to help make sure that a device boots using only software that is trusted by the Original Equipment Manufacturer (OEM)“. That is the problem that I have. After a reboot the driver (software) is gone/not working because it is a driver for a different module than Dell put in the original laptop.
  8. Remove WIDCOMM Bluetooth Software

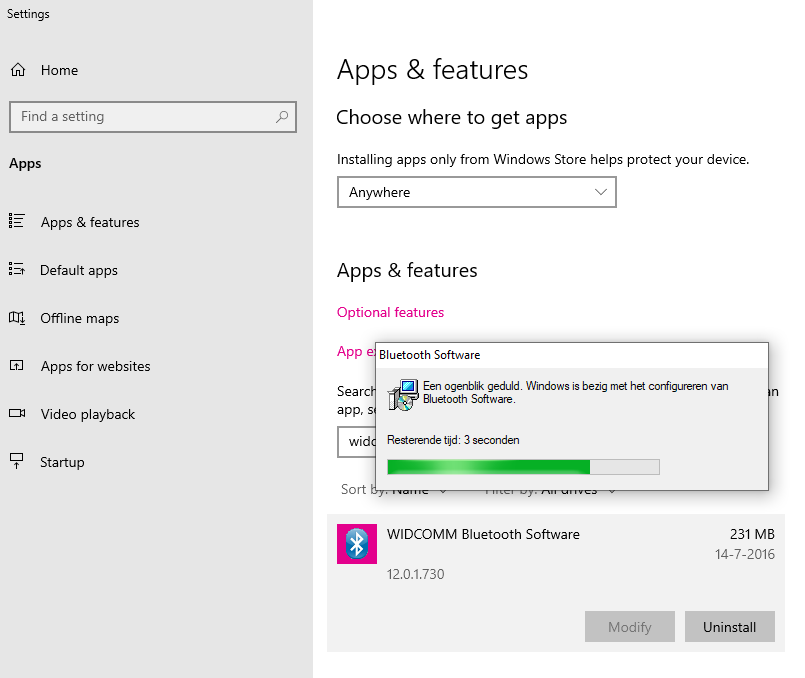
Rebooted the pc and voila everything was working. Now after a week I have no problems anymore and I can enjoy my Bluetooth mouse and headset without reinstalling the Bluetooth driver.

Some thoughts

I think we need to be careful with new updates. It works now so why change the drivers? Also updates of the bios can give problems. If there is a bios update of Dell, the secure boot option will properly be enabled again which will interfere with your module again.

Hopefully this blog post will help someone. It will do for me when I will do a clean install of my device in the future.

Best Visual Studio extensions and applications

The list of tools beneath are tools that I use every day! Some are extensions for Team Foundation Server but also extensions for Visual Studio, awesome Nuget packages or general tools.
It are the best Visual Studio extension and applications that I could find.

Visual Studio Extensions

  1. EnterpriseLibrary.Config
    This is a handy tool for your Enterprise Library packages. With this tool you can edit your config with an interface.
  2. GhostDoc
    I use the free version of this but you also have a payed version of this.  With this tool you can generate your summaries above your code. It will also generate documentation for parameters, properties, field, methods etc.
  3. NuGet Package Manager
    I think there is no explanation needed for this…
  4. Target Framework Migrator
    With this extension, you can change all (if you want) your projects to a specific version of the .NET Framework with just one click.
  5. Team Foundation Server Power Tools
    Extra handy things for getting some information out of your TFS server.
  6. Web Essentials
    Handy tools for developing web applications. This allows you to minify and bundle your Javascript code and gives you other things like intellisence for extra languages in Visual Studio.
  7. Wix Toolset
    There is no MSI installer anymore in Visual Studio 2012. You can still use Wix to create your MSI installers.
  8. Recent workitems
    Show a list of last 5 associated workitems in your pending changes window
  9. Last workitem
    Select your last associated workitem
  10. AutoMerge
    AutoMerge your changeset over branches in TFS.
  11. Code Review Checkin policy
    A checkin policy for checking you have requested a code review.
  12. DevExpress CodeRush
    Faster coding and shortcuts in Visual Studio
  13. My History
    Your last history items like workitems or changesets
  14. Sandcastle
    Help file generator for your code.

Applications

  1. TFS Team Project Manager
    Manage your TFS team projects.

NuGet packages

  1. StyleCop
    Create defaults for your team about documentation and code formats.
  2. StyleCop Checkin Policy
    My own checkin policy for validating your StyleCop rules.
  3. Ninject
    Very easy dependency container for fast building applications.
  4. CuttingEdge.Conditions
    Small syntax for creating validation of your objects.
  5. NBuilder
    Generate test data based on your own POCO class.
  6. AutoMapper
    Map your classes from type A to B with just own line of code.

Edit outlook.com contacts in android

Updated 2017-01-17: Updated the blogpost to the new outlook.com experience (on the office 365 platform).

Edit outlook.com contacts in android is a real pain. But in this post I will explain to you have to fix this.

Because Google and Microsoft are in some kind of war in what the best way is to edit contacts, you could be having troubling with editing your Outlook.com contacts in Android. Follow these steps to edit your Outlook.com contacts again.

  1. If you have installed the Outlook.com application out of the play store, remove it from your device. It has been replaced by the new Outlook application some time ago.
  2. Setup the new Outlook application and disable contact sync. Contacts do get synced to your device very nice but you can’t edit them. So they are useless to use. We disable the sync so we can sync them another way. If you leave this enabled you will end up with dupplicates on your phone.
  3. On your phone, go to Settings -> Accounts & Sync
  4. Add an Exchange ActiveSync account. Do not use the outlook.com account. some phones will display an outlook.com sync possibility but that is an old obsolete one. If you can’t find an Exchange account, try to use the default email application on your phone. It should have one build in.
    1. Account name: whatever you want
    2. email adres: your outlook.com email adres (could also be hotmail, msn, live etc)
    3. Server adres: eas.outlook.com
    4. username: again your full email-address
    5. password: your outlook.com email-address password
    6. Enable SSL
    7. Leave the rest default
  5. Click next and select only to sync the Contacts.
  6. Finish the setup (wait a while to finish the syncing of your contacts). Now you can edit your contacts and they are synced to your outlook.com account.

How to fix the CA0053 error in Code Analysis in Visual Studio 2012

I upgraded one big Team project with a lot of different solutions (to separate stuff) to Visual Studio 2012. The custom Code Analysis gave me an CA0053 error on the build server. So I searched for the problem and came to this great blog post: How to fix the CA0053 error in Code Analysis in Visual Studio 2012. This solved my problem. I removed all the tags CodeAnalysisRuleDirectories and CodeAnalysisRuleSetDirectories. This was enough. Now Visual Studio 2012 would get the latest Code Analysis dll’s.

When queued another build, I still got the same error. This was not in all solutions so it had something to do with the solution file or with some of the projects inside it. After removing the project one at the time (after each try the build succeeded) I did a reset of the solution file so that was the same. At the end, all projects where the same and I still got the error. I then searched for a difference between solutions files.

There was the solution, the version of the file format was different and the Visual Studio version was different.

image

I think that I know what the cause of the problem is. Because we have a lot of different solution files (with overlapping projects in it), all the upgrades to Visual Studio 2012 where already done. Because they where already done, no file change was done so the format file version wasn’t migrated to the Visual Studio 2012 version. The custom ruleset in the projects where searching for the Visual Studio 2012 dll’s but the solution was build in Visual Studio 2010 on the build server because of the different format version.

Hopefully this fix will help someone. Let me know!


Update 11/06/2013:

We upgraded our solution to VS2013 and the Custom Code Analysis didn’t work again. So I builded the custom rules in VS2013 and used that version of the DLL. Now the clients worked again. When I started a CI build, the build failed with the CA0053 error. It seems that the build server has (in my opinion) a bug that it uses the format version of your solution file -1 to determine the Visual Studio version. Visual Studio 2013 uses the same format version as VS2012 (version 12) so you will end up with VS2012 on the build server. But because we have builded the custom rules against VS2013, the buildserver wont recognize the rules. The solution is to add the /p:VisualStudioVersion=12.0 parameter by the “MSBuild Argurments” in your CI build definition.

VC 10.0 Runtime file failed verification with installing TFS Test Controller

Yesterday I was creating three virtual servers for a customer of me with the TFS 2010 Testcontroller and test agents installed on it. The virtual servers are all new Windows Server 2008 SP2 versions. The first thing that I had to do was (obviously) installing the TFS test controller software. So I started the ISO that the system administrator had mounted for me and started the setup. After that I clicked installing test controller software because that was needed on the first server. The setup said it would install the VC 10.0 Runtime for me and the test controller so I hit the next button. The installation started but after say 5 seconds the setup failed. I opened the setup log file and saw a weird error:


CMsiComponent::Install() expects the setup file for VC 10.0 Runtime (x86), but the file failed verification.


This was not clear for me what to do so I did a search with my favorite search engine. I saw a lot of post with a corrupted version of the Visual Studio 2010 ISO. But this was not the case because this was TFS software. So I downloaded the ISO myself again and extracted all the files. This gave me also the same error.

Then I remembered that I had this error one time before. It took me 2,5 hours of searching and trying before I remembered that… I downloaded Daemon Tools lite (mounting software) and mounted my new downloaded ISO on my new virutal DVD player. Started the setup again and now it installed within a minute. Very strange but you have to mount the ISO directly on the Windows Server 2008 server and not from a network share. I tried the solution on the other two servers (they where giving me the same error) and there the solution worked also instantly.

Hopefully I help someone with this problem or a related problem so your not searching 2,5 hours for a solution (a second time).

Use Config Transforms when Debugging your web application

Config Transforms are a great way to adjust your publish strategy. You just right click your web.config file and click “Add Config Transforms”. In that way you get the transform files of your configuration options.

In our company, we are working with a website that has multiple versions for different customers. So it is the same website only the config is changed. The config includes all kind of security settings. When we are developing we want to use the config of the specific “brand” of the website. How to accomplish this without?

SlowCheetah is a nice extension for visual studio that gives that option for WinForms projects but not (yet) for Web Applications. See the issue for this feature:
https://github.com/sayedihashimi/slow-cheetah/issues/39


For now I found this solution:

  1. Create your transforms as you want.
  2. Create a new config file with the name web.template.config
  3. Copy everything from your web.config file to the new web.template.config
  4. Create new config files for temp for your transforms. So if you have the transforms Debug and Release, you should create temp files for them. Call them web.dev.{Configuration}.config. So this would be web.dev.debug.config and web.dev.release.config. Place the config files in the root of your project just like your standard web.config.
  5. Copy everything from your transform files to the temp files.
  6. Add a target file to the root of your project location. Don’t do this in Visual Studio but just in Windows Explorer. Give it the following name: {Projectname}.wpp.targets
  7. Past the code beneath in the targets file.
  8. Delete your “old” web.config in Windows Explorer (not in Visual Studio)
  9. Restart Visual Studio and open your project. The solution explorer says now that you don’t have a web.config but you see the config transforms as childs. Ignore the alert that the file is missing.
  10. Rebuild your project and your done. The new web.config is generated on your drive. (if you hit refresh in the solution explorer, the alert is gone). Just change your Configuration at the top of Visual Studio and your config is changed.

Notes
Remove your web.config file from source control otherwise you will get check outs.

Screenshots
Config transforms for F5

SlowCheetah targets files


Contents of targets file

<?xml version="1.0" encoding="utf-8"?>
<Project ToolsVersion="4.0" xmlns="http://schemas.microsoft.com/developer/msbuild/2003">

  <PropertyGroup>
    <PrepareForBuildDependsOn>
      $(PrepareForBuildDependsOn);
      UpdateWebConfigBeforeBuild;
    </PrepareForBuildDependsOn>
  </PropertyGroup>

  <!-- This target will run right before you run your app in Visual Studio -->
  <Target Name="UpdateWebConfigBeforeBuild">
    <Message Text="Configuration: $(Configuration): web.dev.$(Configuration).config"/>
    <TransformXml Source="web.template.config"
              Transform="web.dev.$(Configuration).config"
              Destination="web.config" />
  </Target>

  <!-- Exclude the config template files from the created package -->
  <Target Name="ExcludeCustomConfigTransformFiles" BeforeTargets="ExcludeFilesFromPackage">
    <ItemGroup>
      <ExcludeFromPackageFiles Include="web.template.config;web.dev.*.config"/>
    </ItemGroup>
    <Message Text="ExcludeFromPackageFiles: @(ExcludeFromPackageFiles)" Importance="high"/>
  </Target>
</Project>


Update
An optional thing that you can do is, grouping your config files beneath the template config just like that standard web.config and his transforms. The dev configs are dependent upon the template so let’s place them there. To do this is easy. Unload your project and find your dev configs. You will see something like this:

<Content Include="web.dev.{your configuration}.config" />

Change this in:

<Content Include="web.dev.{your configuration}.config">
  <DependentUpon>web.template.config</DependentUpon>
</Content>

Repeat this for all your dev transforms. After that, save the file and reload your project.
You can also use the Visual Studio extension VSCommands. right click the files that you want to group, hit group items and select your base config file.

Add video support in Blogging with Word 2013

When you write a blog in Microsoft Office Word 2013, the option to add a video isn’t their by default. You can add the video support on the following way:

  1. Go to the insert Ribbon tab
  2. Right click on an empty area and select “Customize the Ribbon”
  3. Add a new Group to the insert Ribbon tab and call it Video

  4. Choose “All Command”

  5. Search for “Online Video” and click the “Add” button in the middle so it will added to the Video group.

  6. Click OK and your done. The result will look like this

    Now you can add Videos from other sites in your blog post

TFS connection Value cannot be null

In our company, we are upgrading from TFS 2010 to TFS 2012. So to test everything we have a clone of the TFS server.

To test the clone I had to switch my connection to the different servers. After hitting the “Connect” button I got a “Value cannot be null.” exception. It said that also that: “Parameter name: baseUri” was the problem. After contacting a colleague of me, he said to delete the cache of the TFS server on my computer. After doing that, the connection worked as it suppose to work.

You can find the cache in the following folder: C:Users<yourusername>Local SettingsApplication DataMicrosoftTeam Foundation2.0Cache

Minification and Bundling in MVC 4 RC

Asp .NET MVC 4 Release Candidate is out. One of the features that is included is called the minification and bundling feature. This was already there in the beta but in the release candidate version it has changed.

Why should we use it

The reason why we should use the bundling and minification feature is performance. The features increases your loading performance of your website. Every time you reference a JavaScript (like jQuery or your own), or CSS file in your page, the browser makes a call to the server. This is done for each separate reference. Each referenced file has included all the comments and spacing in your file. This makes the file larger then when we should delete those spaced. The bundling and minification feature does this for us.

How does it work

In your Global.asax the CSS and JavaScript files are Bundled with BundleConfig.RegisterBundles(BundleTable.Bundles); line.

image

image

Reference the files in your page.

image

When you run the application and use Fiddler to view the calls to your server, you still see all the files called separately.

image

image

This is because the Bundling and Minification feature by default only work when your not in debug mode. This handy because then you could debug with all the whitespaces in your files and have the performance in the production environment.

See the difference in your production environment:

image

image

Force Bundling and Minification

You can use the BundleTable.EnableOptmizations override but the best way for a little test is to remove the debug=”true” attribute in your web.config.

image

Browser caching

When the feature is active, the browser will cache the files. When you add or change some JavaScript or CSS code, the files are generated again and the version number in the references are updated. In that way, the browser knows that there is a new version and your website wont brake.

image