Update TypeMock version with AutoDeploy enabled

We use TypeMock in a project. We also use the TypeMock AutoDeploy feature so we can use different versions of TypeMock on one build server. The AutoDeploy feature of TypeMock makes it possible to run your unit tests on the build server without installing TypeMock on the build server. You can read about this feature in my other blog post:


https://www.locktar.nl/programming/embed-typemock-in-your-tfs-build-definition


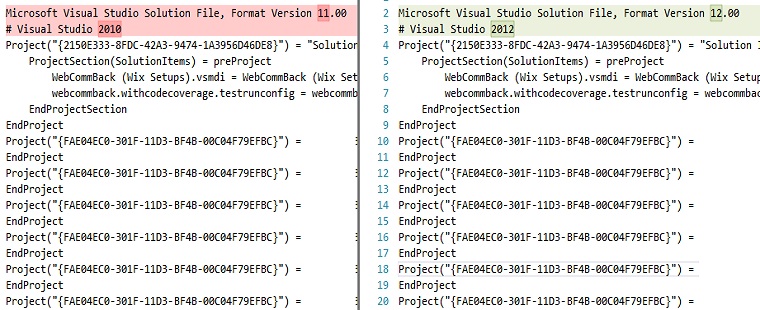
Because we are using VS2013 now, we had to upgrade the TypeMock version to a new Release Candidate version that I got from TypeMock for testing. When we where testing, we saw that the tests where failing because the old version was referenced in the AutoDeploy folder. So we had to update the TypeMock version in source control to keep the AutoDeploy functionality working on the build server. After some tries, I now have a best practice for update TypeMock.


  1. Uninstall TypeMock (not always necessary but for this Release Candidate they advised me to do it)
  2. Install your new version of TypeMock (you whole team off course)
  3. Search for your AutoDeploy folder in the root of your project and check it out of TFS
  4. Open your solution and go to the TypeMock menu and choose “Fix references…”
  5. Choose the second radio button that says “Copy libraries from installation folder to:” and browse to your AutoDeploy folder of step 3
  6. Hit ok. Now every test project that uses TypeMock will be modified with the new TypeMock version. The TypeMock folder in the AutoDeploy folder now also has the new version of the dll.
  7. If some of the projects have a TypeMock references to your program files, you have to change it. This is needed because otherwise the AutoDeploy feature isn’t working. To fix this, you have to delete the reference and add a new one. Browse for the right dll to the TypeMock folder in the AutoDeploy folder in the root of your project. Repeat this for every reference in every project that has the wrong path.
  8. Browse with Windows Explorer to your TypeMock installation directory in program files. In this installation directory you will also find an AutoDeploy folder. Copy all the files in that folder and overwrite your old TypeMock version files in the AutoDeploy folder in the root of your project. 
  9. Check everything in and test your build

 When you followed these steps, you have the new TypeMock version in your project in minutes. 

How to fix the CA0053 error in Code Analysis in Visual Studio 2012

I upgraded one big Team project with a lot of different solutions (to separate stuff) to Visual Studio 2012. The custom Code Analysis gave me an CA0053 error on the build server. So I searched for the problem and came to this great blog post: How to fix the CA0053 error in Code Analysis in Visual Studio 2012. This solved my problem. I removed all the tags CodeAnalysisRuleDirectories and CodeAnalysisRuleSetDirectories. This was enough. Now Visual Studio 2012 would get the latest Code Analysis dll’s.

When queued another build, I still got the same error. This was not in all solutions so it had something to do with the solution file or with some of the projects inside it. After removing the project one at the time (after each try the build succeeded) I did a reset of the solution file so that was the same. At the end, all projects where the same and I still got the error. I then searched for a difference between solutions files.

There was the solution, the version of the file format was different and the Visual Studio version was different.

image

I think that I know what the cause of the problem is. Because we have a lot of different solution files (with overlapping projects in it), all the upgrades to Visual Studio 2012 where already done. Because they where already done, no file change was done so the format file version wasn’t migrated to the Visual Studio 2012 version. The custom ruleset in the projects where searching for the Visual Studio 2012 dll’s but the solution was build in Visual Studio 2010 on the build server because of the different format version.

Hopefully this fix will help someone. Let me know!


Update 11/06/2013:

We upgraded our solution to VS2013 and the Custom Code Analysis didn’t work again. So I builded the custom rules in VS2013 and used that version of the DLL. Now the clients worked again. When I started a CI build, the build failed with the CA0053 error. It seems that the build server has (in my opinion) a bug that it uses the format version of your solution file -1 to determine the Visual Studio version. Visual Studio 2013 uses the same format version as VS2012 (version 12) so you will end up with VS2012 on the build server. But because we have builded the custom rules against VS2013, the buildserver wont recognize the rules. The solution is to add the /p:VisualStudioVersion=12.0 parameter by the “MSBuild Argurments” in your CI build definition.

Typemock Settings

Embed Typemock in your TFS Build definition

When you want to test your code that uses Typemock, you can use a Team Foundation Server Build Server. The current version of Typemock is 7.4 and this version (introduced in 6.2) has the AutoDeploy feature included. This is very important because now you can use multiple versions of Typemock on one Build server. The reason for that is that you don’t have to install Typemock on you build server anymore. To setup Typemock Autodeploy, you can use the tutorial on their help page in the chapter: Typemock Isolator Integration with Team Foundation Server 2010 (TFS). The only thing that they forgot to mention in the documentation is that there is generated a Typemock directory with a couple of dll’s in it inside your just added AutoDeploy directory. This is done after you fixed the references and restarted Visual Studio. Don’t forget to checkin that directory.

In the help documentation, they say that you have to use the workflow of Typemock to get the AutoDeploy to work. The customer that I now work for already have a custom workflow. I just created that workflow last week with some custom actions for them. So I want to integrate the custom Typemock stuff in the workflow of the customer. The customer works with TFS 2010 (just migrated a few months ago from 2008 so they have a lot of catching up to do) so this blog is aimed at TFS Build 2010. But this will also work for 2012. You can also check the documentation about Typemock with TFS 2012 on their website.


The differences between the build templates

There only 4 differences between the template that are special for Typemock. I will show them beneath. The only thing that you have watch for is the right place to put custom activities on the right place.

First open your own workflow in the designer. In your toolbox, add a new category and choose the TypeMock.TFS2010.dll assembly in the installation directory of your Typemock version on your machine. After that, three custom activities are added to your toolbox. Don’t forget to reference the dll in your project where your custom workflow is located.

image

Now add the activities on the right place by dragging them into the workflow. You don’t have to edit any properties. On the left side, you see the default template of TFS 2010. On the right side the template of Typemock. Drag the activities on the same place in your own workflow.

Registreren Typemock

Stoppen Typemock

After that, add a workflow argument of the TypemockSettings type. You can optionally edit the Metadata argument to customize the text that you will see in you build definition.

Typemock arguments

Save your workflow and checkin your workflow. Restart Visual Studio and configure the license in your build definition.

That’s it! It’s very easy. It is not more than 10 minutes of work to edit your own template. When you run your build now with the AutoDeploy feature on and with entering the right license info in your build definition, the build will succeed en will test your Typemock tests.

VC 10.0 Runtime file failed verification with installing TFS Test Controller

Yesterday I was creating three virtual servers for a customer of me with the TFS 2010 Testcontroller and test agents installed on it. The virtual servers are all new Windows Server 2008 SP2 versions. The first thing that I had to do was (obviously) installing the TFS test controller software. So I started the ISO that the system administrator had mounted for me and started the setup. After that I clicked installing test controller software because that was needed on the first server. The setup said it would install the VC 10.0 Runtime for me and the test controller so I hit the next button. The installation started but after say 5 seconds the setup failed. I opened the setup log file and saw a weird error:


CMsiComponent::Install() expects the setup file for VC 10.0 Runtime (x86), but the file failed verification.


This was not clear for me what to do so I did a search with my favorite search engine. I saw a lot of post with a corrupted version of the Visual Studio 2010 ISO. But this was not the case because this was TFS software. So I downloaded the ISO myself again and extracted all the files. This gave me also the same error.

Then I remembered that I had this error one time before. It took me 2,5 hours of searching and trying before I remembered that… I downloaded Daemon Tools lite (mounting software) and mounted my new downloaded ISO on my new virutal DVD player. Started the setup again and now it installed within a minute. Very strange but you have to mount the ISO directly on the Windows Server 2008 server and not from a network share. I tried the solution on the other two servers (they where giving me the same error) and there the solution worked also instantly.

Hopefully I help someone with this problem or a related problem so your not searching 2,5 hours for a solution (a second time).

Use Config Transforms when Debugging your web application

Config Transforms are a great way to adjust your publish strategy. You just right click your web.config file and click “Add Config Transforms”. In that way you get the transform files of your configuration options.

In our company, we are working with a website that has multiple versions for different customers. So it is the same website only the config is changed. The config includes all kind of security settings. When we are developing we want to use the config of the specific “brand” of the website. How to accomplish this without?

SlowCheetah is a nice extension for visual studio that gives that option for WinForms projects but not (yet) for Web Applications. See the issue for this feature:
https://github.com/sayedihashimi/slow-cheetah/issues/39


For now I found this solution:

  1. Create your transforms as you want.
  2. Create a new config file with the name web.template.config
  3. Copy everything from your web.config file to the new web.template.config
  4. Create new config files for temp for your transforms. So if you have the transforms Debug and Release, you should create temp files for them. Call them web.dev.{Configuration}.config. So this would be web.dev.debug.config and web.dev.release.config. Place the config files in the root of your project just like your standard web.config.
  5. Copy everything from your transform files to the temp files.
  6. Add a target file to the root of your project location. Don’t do this in Visual Studio but just in Windows Explorer. Give it the following name: {Projectname}.wpp.targets
  7. Past the code beneath in the targets file.
  8. Delete your “old” web.config in Windows Explorer (not in Visual Studio)
  9. Restart Visual Studio and open your project. The solution explorer says now that you don’t have a web.config but you see the config transforms as childs. Ignore the alert that the file is missing.
  10. Rebuild your project and your done. The new web.config is generated on your drive. (if you hit refresh in the solution explorer, the alert is gone). Just change your Configuration at the top of Visual Studio and your config is changed.

Notes
Remove your web.config file from source control otherwise you will get check outs.

Screenshots
Config transforms for F5

SlowCheetah targets files


Contents of targets file

<?xml version="1.0" encoding="utf-8"?>
<Project ToolsVersion="4.0" xmlns="http://schemas.microsoft.com/developer/msbuild/2003">

  <PropertyGroup>
    <PrepareForBuildDependsOn>
      $(PrepareForBuildDependsOn);
      UpdateWebConfigBeforeBuild;
    </PrepareForBuildDependsOn>
  </PropertyGroup>

  <!-- This target will run right before you run your app in Visual Studio -->
  <Target Name="UpdateWebConfigBeforeBuild">
    <Message Text="Configuration: $(Configuration): web.dev.$(Configuration).config"/>
    <TransformXml Source="web.template.config"
              Transform="web.dev.$(Configuration).config"
              Destination="web.config" />
  </Target>

  <!-- Exclude the config template files from the created package -->
  <Target Name="ExcludeCustomConfigTransformFiles" BeforeTargets="ExcludeFilesFromPackage">
    <ItemGroup>
      <ExcludeFromPackageFiles Include="web.template.config;web.dev.*.config"/>
    </ItemGroup>
    <Message Text="ExcludeFromPackageFiles: @(ExcludeFromPackageFiles)" Importance="high"/>
  </Target>
</Project>


Update
An optional thing that you can do is, grouping your config files beneath the template config just like that standard web.config and his transforms. The dev configs are dependent upon the template so let’s place them there. To do this is easy. Unload your project and find your dev configs. You will see something like this:

<Content Include="web.dev.{your configuration}.config" />

Change this in:

<Content Include="web.dev.{your configuration}.config">
  <DependentUpon>web.template.config</DependentUpon>
</Content>

Repeat this for all your dev transforms. After that, save the file and reload your project.
You can also use the Visual Studio extension VSCommands. right click the files that you want to group, hit group items and select your base config file.

Internet Explorer cannot display SharePoint 2013 ODATA feed

When your starting developing in SharePoint 2013 you can use the Client Object Model (CSOM). Well this is the “old” approach of developing against SharePoint. Starting from SP 2013 you can use ODATA to develop againt SP 2013. The only thing that you have to do is to go to your SharePoint 2013 site and add _api to it. Example: http://Servername/_api

When you want to see the list available in your site you just enter lists behind it. Example: http://Servername/_api/lists

When you do that in Internet Explorer you would get the screen rendered as below.
Atom SP13

The data is there but it isn’t shown as you want. To fix this follow the steps below.

Go to internet options and change:
IE options content
IE feed render settings

When you navigate again to that page (F5 won’t work), the ODATA is shown like this now:
ODATA SP13

TFS 2010 Build server with TFS 2012 Update 2

TFS 2012 Update 2 is released last week. I’m working in a large company with a lot of TFS 2010 build servers. With Update 2, TFS 2012 supports the build server of TFS 2010. This is a huge advantage because now we don’t have to upgrade all the build server at the same moment.

When I was testing my TFS 2010 build server (a clone of the production) the build server wasn’t working. I got the message “The device is not ready”.

I checked the ALM blogs about the new feature from Update 2 and saw that the build server needed Service Pack 1. I downloaded, installed it and after 15 minutes everything was done. I rebooted and installed 3 critical updates for SP1. I rebooted again and tested my build again. It was still not working. The strange error with no information about it was still there.

I checked all the settings of the build server and everything seemed to be right. I unregistered the build server from my collection and deleted the controller and agent. After registering the build server to the collection, I created a new controller and agent with the same settings as before. I tested the Build definition again and everything was working right this time!

What really was the problem is not clear but it could be the case that registering tot TFS 2012 without SP 1 for the TFS 2010 build server could be the problem or the controller and agent should alway be recreated.

We also tested a newly created TFS 2010 SP1 Build server connecting to TFS 2012 and then everything was working the first time we tried.

Multiple select listbox in MVC 4

This post will be in Dutch because I based this on a discussion with someone else.

Vandaag gaf ik al weer voor de vierde keer les op de Hogeschool van Rotterdam. Daar geef ik les aan een groep studenten in het vak Microsoft ASP .NET MVC 4 met alle standaard tools als Entity Framework en Web API er om heen.

Bob Joziasse sprak ik vandaag over een multiple select in een listbox voor zijn laatste blog Eggplication die in het leuke paas thema is geschreven. Ik ben er even ingedoken aangezien ik zelf de listbox in HTML nooit gebruik. Op zich is het een standaard control en het is al snel duidelijk voor een gebruiker wat hij er mee kan doen. Ik zelf gebruik hem nooit omdat de styling van het control niet voor elke browser gelijk is. Maarja, terug naar het onderwerp.

In zijn blog heeft Bob een kleine applicatie gemaakt om aan het te geven hoe een meer op meer relatie werkt door middel van Code First in het wel bekende Entity Framework. In de applicatie kan je een ei maken en die verschillende templates geven voor het beschilderen. Ik heb de applicatie hetzelfde genoemd maar de properties van de objecten een beetje mijn eigen gang laten gaan. Zo heb ik ook een meer op meer relatie en kan ik dus templates koppelen aan een ei en eieren koppelen aan (schilder)templates.

De objecten zien er als volgt uit:

Egg:

Template:

Simpele ViewModel voor de Create van de Egg:

De database wordt dan als volgt gegenereerd:

De controller met de Create Get en Post functies zien er dan als volgt uit:

Om dit werkend te krijgen hebben we natuurlijk ook een View nodig. Dit ziet er bij mij zo uit:

Als we dit draaien ziet dat er als volt uit:

Om vervolgens dit weer te kunnen bekijken heb ik het als volgt gemaakt:

Wat resulteert in onderstaande om het ei met de gekozen templates te kunnen weergeven:

Een simpele applicatie maar wel handig om snel een meer op meer relatie te maken met een listbox.

Add video support in Blogging with Word 2013

When you write a blog in Microsoft Office Word 2013, the option to add a video isn’t their by default. You can add the video support on the following way:

  1. Go to the insert Ribbon tab
  2. Right click on an empty area and select “Customize the Ribbon”
  3. Add a new Group to the insert Ribbon tab and call it Video

  4. Choose “All Command”

  5. Search for “Online Video” and click the “Add” button in the middle so it will added to the Video group.

  6. Click OK and your done. The result will look like this

    Now you can add Videos from other sites in your blog post