DbInitializer dotnet core 2.0

Seed database with users and roles in dotnet core 2.0

In this post I will explain how to seed database users roles dotnet core 2.0 ef. For this we use the UserManager and RoleManager of the AspNetCore Identity framework. In that way, your application already has a default user and role for in example logging into the application. You can use it for test data but also for new installations of your application. In my case I will create a default Administrator user with the Administrator role attached to it for new installations of the application.

Seeding a database in dotnet core 2.0 is different than earlier versions. I followed the basics of the new documentation of Microsoft to get to a good solution. So I first created a new project with the authentication set to Individual Accounts.

Program.cs

In the program.cs class I changed the code to the following:

public class Program
{
    public static void Main(string[] args)
    {
        var host = BuildWebHost(args);

        using (var scope = host.Services.CreateScope())
        {
            var services = scope.ServiceProvider;
            try
            {
                var context = services.GetRequiredService<ApplicationDbContext>();
                var userManager = services.GetRequiredService<UserManager<ApplicationUser>>();
                var roleManager = services.GetRequiredService<RoleManager<IdentityRole>>();

                var dbInitializerLogger = services.GetRequiredService<ILogger<DbInitializer>>();
                DbInitializer.Initialize(context, userManager, roleManager, dbInitializerLogger).Wait();
            }
            catch (Exception ex)
            {
                var logger = services.GetRequiredService<ILogger<Program>>();
                logger.LogError(ex, "An error occurred while seeding the database.");
            }
        }

        host.Run();
    }

    public static IWebHost BuildWebHost(string[] args) =>
        WebHost.CreateDefaultBuilder(args)
            .UseStartup<Startup>()
            .Build();
}

This is almost the same code as the documentation but I also injected a RoleManager and UserManager so we can create the default user and role for the application. When the instances are created the Initialize method of the DbInitializer is called. This can be used to seed your database.

Because I want to know more information about my users than just their email and username, I extended the ApplicationUser object that is used to create a user in the database with the UserManaer.

// Add profile data for application users by adding properties to the ApplicationUser class
public class ApplicationUser : IdentityUser
{

    public ApplicationUser()
        : base()
    {
    }
   
    public ApplicationUser(string userName, string firstName, string lastName, DateTime birthDay)
        : base(userName)
    {
        base.Email = userName;

        this.FirstName = firstName;
        this.LastName = lastName;
        this.BirthDay = birthDay;

    }

    [Required]
    [StringLength(50)]
    public string FirstName { get; set; }

    [Required]
    [StringLength(50)]
    public string LastName { get; set; }

    [Required]
    [DataType(DataType.Date)]
    public DateTime BirthDay { get; set; }

    public string FullName => $"{this.FirstName} {this.LastName}";
}

I like constructors for new objects so I will use the long constructor to create my default user.
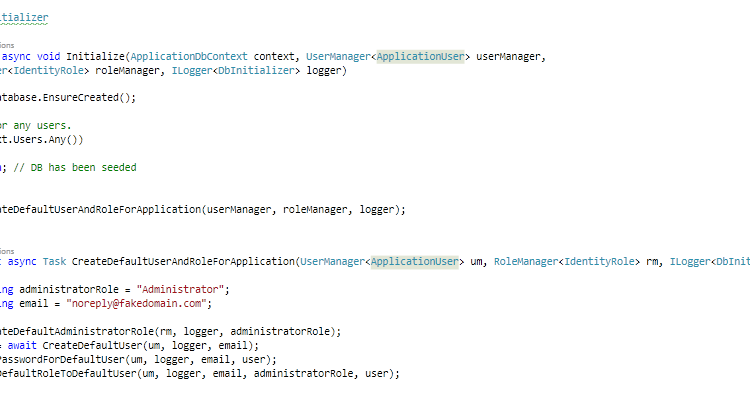
DbInitializer

The DbInitializer is the class that is used to seed the database. It is created by the program class. It has a static method Initialize that will be used to pass the external dependencies. The Initialize method will be used to orchestrate all the actions.

public class DbInitializer
{
    public static async Task Initialize(ApplicationDbContext context, UserManager<ApplicationUser> userManager,
        RoleManager<IdentityRole> roleManager, ILogger<DbInitializer> logger)
    {
        context.Database.EnsureCreated();

        // Look for any users.
        if (context.Users.Any())
        {
            return; // DB has been seeded
        }

        await CreateDefaultUserAndRoleForApplication(userManager, roleManager, logger);
    }

    private static async Task CreateDefaultUserAndRoleForApplication(UserManager<ApplicationUser> um, RoleManager<IdentityRole> rm, ILogger<DbInitializer> logger)
    {
        const string administratorRole = "Administrator";
        const string email = "noreply@your-domain.com";

        await CreateDefaultAdministratorRole(rm, logger, administratorRole);
        var user = await CreateDefaultUser(um, logger, email);
        await SetPasswordForDefaultUser(um, logger, email, user);
        await AddDefaultRoleToDefaultUser(um, logger, email, administratorRole, user);
    }

    private static async Task CreateDefaultAdministratorRole(RoleManager<IdentityRole> rm, ILogger<DbInitializer> logger, string administratorRole)
    {
        logger.LogInformation($"Create the role `{administratorRole}` for application");
        var ir = await rm.CreateAsync(new IdentityRole(administratorRole));
        if (ir.Succeeded)
        {
            logger.LogDebug($"Created the role `{administratorRole}` successfully");
        }
        else
        {
            var exception = new ApplicationException($"Default role `{administratorRole}` cannot be created");
            logger.LogError(exception, GetIdentiryErrorsInCommaSeperatedList(ir));
            throw exception;
        }
    }

    private static async Task<ApplicationUser> CreateDefaultUser(UserManager<ApplicationUser> um, ILogger<DbInitializer> logger, string email)
    {
        logger.LogInformation($"Create default user with email `{email}` for application");
        var user = new ApplicationUser(email, "First", "Last", new DateTime(1970, 1, 1));

        var ir = await um.CreateAsync(user);
        if (ir.Succeeded)
        {
            logger.LogDebug($"Created default user `{email}` successfully");
        }
        else
        {
            var exception = new ApplicationException($"Default user `{email}` cannot be created");
            logger.LogError(exception, GetIdentiryErrorsInCommaSeperatedList(ir));
            throw exception;
        }

        var createdUser = await um.FindByEmailAsync(email);
        return createdUser;
    }

    private static async Task SetPasswordForDefaultUser(UserManager<ApplicationUser> um, ILogger<DbInitializer> logger, string email, ApplicationUser user)
    {
        logger.LogInformation($"Set password for default user `{email}`");
        const string password = "YourPassword01!";
        var ir = await um.AddPasswordAsync(user, password);
        if (ir.Succeeded)
        {
            logger.LogTrace($"Set password `{password}` for default user `{email}` successfully");
        }
        else
        {
            var exception = new ApplicationException($"Password for the user `{email}` cannot be set");
            logger.LogError(exception, GetIdentiryErrorsInCommaSeperatedList(ir));
            throw exception;
        }
    }

    private static async Task AddDefaultRoleToDefaultUser(UserManager<ApplicationUser> um, ILogger<DbInitializer> logger, string email, string administratorRole, ApplicationUser user)
    {
        logger.LogInformation($"Add default user `{email}` to role '{administratorRole}'");
        var ir = await um.AddToRoleAsync(user, administratorRole);
        if (ir.Succeeded)
        {
            logger.LogDebug($"Added the role '{administratorRole}' to default user `{email}` successfully");
        }
        else
        {
            var exception = new ApplicationException($"The role `{administratorRole}` cannot be set for the user `{email}`");
            logger.LogError(exception, GetIdentiryErrorsInCommaSeperatedList(ir));
            throw exception;
        }
    }

    private static string GetIdentiryErrorsInCommaSeperatedList(IdentityResult ir)
    {
        string errors = null;
        foreach (var identityError in ir.Errors)
        {
            errors += identityError.Description;
            errors += ", ";
        }
        return errors;
    }
}

First a new Administrator role is created. In my application this is the highest role a user can have. When the role is created, a new default user is created with the earlier provided constructor. After the user is created, the user needs a password to sign into the application. So a password is set. The last step is to connect the user to the Administrator role so he has all the permissions that he needs.

For logging, I use the default logging extension framework provided by dotnet core. I connected Serilog to the logging extension for better control.

Multiple select listbox in MVC 4

This post will be in Dutch because I based this on a discussion with someone else.

Vandaag gaf ik al weer voor de vierde keer les op de Hogeschool van Rotterdam. Daar geef ik les aan een groep studenten in het vak Microsoft ASP .NET MVC 4 met alle standaard tools als Entity Framework en Web API er om heen.

Bob Joziasse sprak ik vandaag over een multiple select in een listbox voor zijn laatste blog Eggplication die in het leuke paas thema is geschreven. Ik ben er even ingedoken aangezien ik zelf de listbox in HTML nooit gebruik. Op zich is het een standaard control en het is al snel duidelijk voor een gebruiker wat hij er mee kan doen. Ik zelf gebruik hem nooit omdat de styling van het control niet voor elke browser gelijk is. Maarja, terug naar het onderwerp.

In zijn blog heeft Bob een kleine applicatie gemaakt om aan het te geven hoe een meer op meer relatie werkt door middel van Code First in het wel bekende Entity Framework. In de applicatie kan je een ei maken en die verschillende templates geven voor het beschilderen. Ik heb de applicatie hetzelfde genoemd maar de properties van de objecten een beetje mijn eigen gang laten gaan. Zo heb ik ook een meer op meer relatie en kan ik dus templates koppelen aan een ei en eieren koppelen aan (schilder)templates.

De objecten zien er als volgt uit:

Egg:

Template:

Simpele ViewModel voor de Create van de Egg:

De database wordt dan als volgt gegenereerd:

De controller met de Create Get en Post functies zien er dan als volgt uit:

Om dit werkend te krijgen hebben we natuurlijk ook een View nodig. Dit ziet er bij mij zo uit:

Als we dit draaien ziet dat er als volt uit:

Om vervolgens dit weer te kunnen bekijken heb ik het als volgt gemaakt:

Wat resulteert in onderstaande om het ei met de gekozen templates te kunnen weergeven:

Een simpele applicatie maar wel handig om snel een meer op meer relatie te maken met een listbox.

Use .Where().Select().Single() rather than .Single()

When you use the .Single() lambda statement, you will only get one result. When you only use 1 property of the whole object it is totally waste of the performance. Only get want you want. So you could better use the .Select() statement to get only the property you want.

See the difference below where we have an example for getting the profile picture of an unique user.

.Where().Select().Single()

byte[] imageData = Context.Profiles.Where(p => p.Id == profileId).Select(p => p.Picture).Single();

SELECT
[Limit1].[Picture] AS [Picture]
FROM ( SELECT TOP (2)
[Extent1].[Picture] AS [Picture]
FROM [dbo].[Profiles] AS [Extent1]
WHERE [Extent1].[Id] = @p__linq__0
)  AS [Limit1]

.Single()

byte[] imageData = Context.Profiles.Single(p => p.Id == profileId).Picture;

SELECT TOP (2)
[Extent1].[Id] AS [Id],
[Extent1].[FirstName] AS [FirstName],
[Extent1].[LastName] AS [LastName],
[Extent1].[Birthday] AS [Birthday],
[Extent1].[HideBirthdayYear] AS [HideBirthdayYear],
[Extent1].[Picture] AS [Picture],
[Extent1].[ModifiedOn] AS [ModifiedOn],
[Extent1].[UserId] AS [UserId]
FROM [dbo].[Profiles] AS [Extent1]
WHERE [Extent1].[Id] = @p__linq__0


Imagine what the difference would be with nested queries, joins, or even bigger objects (tables) than this example.

Entity Framework: Different loading capabilities

Ralph Jansen BlogThe Entity Framework is in the new stage of evolving. We are now in stage 4.1 where the Code First functionality is released. Entity Framework enables just like LINQ to SQL different kind of loading types. But what are the loading types and what are the different capabilities? In this blog I will explain in a simple way what they are and what they can do.

There are 3 different kind of loading types for related data called lazy, Eager and explicit loading. In the next example you see two entities which are related.

image

Department can have many Courses and a Course can only have one Department.

Lazy Loading:
image 


Eager Loading:
image


Explicit Loading:
image

Because they don’t immediately retrieve the property values, lazy loading and explicit loading are also both known as deferred loading.

In general, if you know you need related data for every entity retrieved, eager loading offers the best performance, because a single query sent to the database is typically more efficient than separate queries for each entity retrieved. For example, in the above examples, suppose that each department has ten related courses. The eager loading example would result in just a single (join) query. The lazy loading and explicit loading examples would both result in eleven queries.

On the other hand, if you need to access an entity’s navigation properties only infrequently or only for a small portion of a set of entities you’re processing, lazy loading may be more efficient, because eager loading would retrieve more data than you need. Typically you’d use explicit loading only when you’ve turned lazy loading off. One scenario when you might turn lazy loading off is during serialization, when you know you don’t need all navigation properties loaded. If lazy loading were on, all navigation properties would all be loaded automatically, because serialization accesses all properties.

Master-Detail with Silverlight RIA Services

Ralph Jansen

If you want to have a master detail view of you data in Silverlight with RIA Services you have to do two things. One thing is to tell your RIA Services meta data file that you’re including the related entities and you will have to tell your domain service as well that your including the related entities. Follow the tutorial beneath to accomplish an example for creating a master detail relation with Silverlight RIA Services.

Silverlight application

Create a new Silverlight 4 application in VS2010 and enable RIA Services. Also don’t forget to check the box to host your Silverlight application in a website.

Model

Create your Entity Framework 4.0 model so we can generate some RIA Service over it. Just use a simple example so we can practice the master detail relationships. The example that I use is shown below.

image

RIA Services

After your model is created we have to create the Domain Service that exposes your model from the server to the client. If you haven’t used RIA Services before, I suggested you should read the documentation on the http://www.silverlight.net homepage.

Select add new item on your server website. The same place as you created your Entity Framework model. Now search for the Domain Service template. After you clicked the OK button, you will get a popup that is asking you to specify which entity the domain service should expose from your Entity Framework model. Click the Brands and Product collections, select the checkbox to generate meta data files and to enable client access.

Your Domain Service would look something like this:
image

Creating the UI

Open your MainPage.xaml file that is generated by creating the Silverlight Application. Open your Data Sources window in VS2010 and drag the Brands and Products grids to your MainPage. You have to drag your Products from the inner collection of Brands.

image

Now if you run your code. Only the brands will be shown because the UI is connected to the GetBrandsQuery. Now we want to include the products to create a Master Detail relation.

Configure the Meta data

Open your meta data file that is generated by the Domain Service. Find your Brands Entity and in that entity the inner collection property of Products. Add the [Include] attribute above the inner collection of products. In that way we tell RIA Services to include the products for the brand if the products are available.

image

Make the products available

To make the products available for RIA Services you should include them in the correct query that is used in the client. In our case it is the GetBrands in the Domain Service class.

image

Add the include statement like below to the query.

image

Now you are ready to run your code and see a nice example of a master detail relationship in the client.

Note:

It is better to create a new query then change the default query. In that way the performance is better because you don’t need the products every time you use the GetBrands query. You can create a query like GetBrandsWithProducts. If you do this, don’t forget to change the query name in the client. This is still referenced to the GetBrands query!!!